Saturday, June 11, 2011

Tcl and Remote Desktop

TclRFB 0.5

TclRFB is a pure-Tcl implementation of the Remote Framebuffer (RFB) protocol that is used in the Virtual Network Computing (VNC) remote desktop application. Currently, TclRFB supports version 3.3 of the RFB protocol. Both client and server functions are supported. Multiple client and/or server instances can exist within the same interpreter. Currently supported RFB encodings are Raw, CopyRect, RRE, CoRRE, and Hextile.
TclRFB requires Tcl 8.4 or later to run. It does not rely on any given widget library. Any widget library with bindings to Tcl can be used (e.g. Tk, gnocl (gTk), or the Tcl bindings to FLTK) or none at all. The authentication component of the protocol is fully supported when either the TclDES (Data Encryption Standard and Triple-DES) or TclDESjr (Data Encryption Standard only) extension is used with TclRFB. The TclDES and TclDESjr extensions can be obtained at http://tcldes.sourceforge.net/.
The TclRFB extension is implemented as the rfb namespace. Within this namespace, procedures and variables that support the protocol are isolated from the global namespace. Additional details of the RFB protocol can be found in "The RFB Protocol" by Richardson and Wood at http://www.realvnc.com/docs/rfbproto.pdf
The intent of TclRFB is to enable the creation of light-weight, scripted remote interfaces, much like Proxy Tk, used in TeamWave (for information, see http://www.usenix.org/events/tcl2k/full_papers/roseman/roseman_html/). The user interface can then be displayed through a VNC viewer, using either the standalone version (Unix, Windows, Macintosh, Palm, and other platforms), the Java-based version running in a web browser, or one based on TclRFB.

Installation

To install the TclRFB library, simply copy the directory tclRFB0.5 and its contents to a directory whose path is listed in the Tcl auto_path variable. Alternately, the path to the TclRFB library can be added to the auto_path variable.
Once the installation is done, the TclRFB library can be loaded into a Tcl interpreter using the package command:
package require tclRFB
This will create the rfb namespace.

RFB Clients

An RFB client is started by making a call to rfb::CreateClientSocket. This procedure is invoked as follows:
rfb::CreateClientSocket host port optlist
Where host is the hostname or IP address (dotted quad) of the computer running a server supporting the RFB protocol, port is the server port number, and optlist is a list of option-value pairs. Note that TclRFB clients can use any port including those traditionally used by VNC servers.
The list of option-value pairs describes the properties of the client. These properties are primarily the client's pixel characteristics and the procedures used to handle the RFB pixel encodings that support the client visualization. The client pixel characteristics are used to inform the server as to the pixel format best handled by the client. The server must transform its local pixel representation into that supported by the client. Additional details of the client options and procedures used to implement an RFB client are presented in the man page.
The call to rfb::CreateClientSocket creates an instance of an RFB client state machine. The state machine processes RFB protocol messages coming from the server. Pixel data received from the server is passed to the client visualization procedures whose names were passed in the option list to rfb::CreateClientSocket. The client procedures take the pixel data provided through the RFB encodings and uses the client visualization library to display the pixels.
An example RFB client, client.tcl, is provided to demonstrate how to use the TclRFB library's client procedures. It can be found in the examples subdirectory of the distribution. The client supports bgr233 truecolor pixel format and 24-bit truecolor (rgb888) pixel format. The user can select the hostname/IP and the port number or display number of the RFB server. The display number port assignment corresponds to that used with VNC, i.e. the port number is equal to the display number plus 5900. Sharing of the connection with other RFB clients can be enabled as well. A password or the path to a file containing an encrypted password can be specified. RFB pixel encoding preferences can also be selected.
The client has been tested against the Unix VNC server 3.3.3r2 and the TclRFB server, rfbcounter.tcl, mentioned below. Either TclDES or TclDESjr must be installed to support RFB authentication. The performance of the TclRFB client compares favorably to that of the Unix vncviewer. Noticeable rendering lags do occur when mouse cursor movements cause focus changes between windows and when large amounts of screen area are written. A screen shot of the client connected to a Unix vncserver is shown here. A screen shot of the client connected to the rfbcounter.tcl server is shown here.

RFB Servers

An RFB server is created by making a call to rfb::CreateServerSocket. This procedure is invoked as follows:

rfb::CreateServerSocket port optlist
Where port is the server port number and optlist is a list of option-value pairs. Note that TclRFB servers can use any port including those traditionally used by VNC servers. The socket that is created then waits for connections from RFB clients.
When a client connects to the server, a server connection instance is created via a call to rfb::AcceptServerSocket. The parameters passed to rfb::CreateServerSocket are applied to the server socket instance. An RFB server state machine is created to process the RFB protocol messages that come from the client.
Procedures provided by TclRFB take the pixel data supplied by the server and convert it to RFB protocol messages. It is the responsibility of the server to make sure the pixel data is in the format appropriate for the client prior to submitting it for encoding. Additional details of the server options and procedures used to implement and RFB are presented in the man page.
An example RFB server, rfbcounter.tcl is provided to demonstrate how to use the TclRFB library's server procedues. This server is inspired by the rfbcounter described at http://www.uk.research.att.com/vnc/rfbcounter.html. It can be found in the examples subdirectory of the distribution. The server supports either a six-digit counter or a 24-hour clock (when the -clock option is specified), which displays in HH:MM:SS format. The foreground and background colors can be also be specified. The display number port assignment corresponds to that used with VNC, i.e. the port number is equal to the display number plus 5900.
The only pixel format supported by the server is bgr233. The only RFB encoding protocol supported is RRE. Therefore, any RFB client that intends to connect to the server must support these formats.
The server has been tested against the Unix VNC viewer 3.3.3r2 and the TclRFB client, client.tcl, mentioned above. It has also been tested with multiple clients connecting to it simultaneously. Either TclDES or TclDESjr must be installed to support RFB authentication. A screen shot of a Unix vncviewer connected to the rfbcounter.tcl server is shown here.

Future goals

There are serveral areas in which TclRFB can be improved or experimented upon:
  • Speed up the pixel encoding and decoding operations.
  • Implement additional of RFB encodings (e.g. ZRLE).
  • Create a user guide.
  • Create more example applications. One currently in development is a TclRFB server that "screen scrapes" from and supplies events to a Tk user interface. It uses the Img extension to facilitate "scraping" the Tk widgets.
  • Use OpenSSL and the TLS extension to enclose the RFB protocol in a secure tunnel. I don't know if this will connect properly to traditional VNC secure tunneling techniques such as ssh/VNC, stunnel/VNC, or ZeBeDee/VNC.
  • Combine TclRFB with tclhttpd to allow serving of the Java VNC client to a browser. Alternately, the Java VNC client could be replaced with a TclRFB client that would run on the Tcl/Tk plugin.

Downloads

TclRFB 0.5 is available as either gzipped tar archive for GNU/Linux (and other Un*xes) or pkzip archive for Microsoft Windows. Both can be obtained at the TclRFB SourceForge Files page.
Earler versions of TclRFB can also be found at the TclRFB SourceForge Files page.
Feedback

Feedback and suggestions for new features for TclRFB are invited. Be aware that development is still ongoing. New versions of TclRFB will be made available as time allows. You can send your emails to maccody@home.com. Replace "home" with "attbi" for all you non-spammers!

Tcl and Android

Tcl and the Android Scripting Environment


 Android when running on a phone does not permit general installation of binaries. The only significant writable filesystem is the sdcard but that is mounted with a non-exec flag to prevent anything running from the card. This means you need to install applications using the system installer which has permission to create files and directories on the data filesystem. The Android Scripting Environment is a project which provides a java shim to get compiled scripting languages installed onto the phone from where they can run script files from the sdcard. It comes with Python, Lua and some others.


I have created a Tcl interpreter package for ASE and it is currently hosted at http://www.patthoyts.tk/tclkit/android-arm This is a modified version of the ASE project to add Tcl support. You need to install the APK file and then copy the three zip files to the root of your sdcard and have ASE install the Tcl8.6b2 interpreter. This includes support for using the JSON interface to the Android interface so the various examples posted for other languages are readily translated into Tcl. See the scripts package but a sample is:

package require android
  set android [android new]
  $android vibrate
  $android getInput "Hello!" "Type something in..."
  $android webSearch "android scripting with tcl"


In the longer term it is probably more sensible to use something with better Java integration. Either Hecl or Jacl would seem good candidates. Hecl is not-quite-tcl and Jacl needs some updating. When I tested a threaded build and tried to create a thread in Tcl the executable aborted so I suspect we cannot make use of tclblend which says it requires threads.

Note that Hecl already has support for Android (see above).


SL4A Supports Tcl

escargo 2010-08-20 - Quoting from this link ([5]):


"Scripting Layer for Android (SL4A, formerly known as Android Scripting Environment or ASE) brings scripting languages to Android by allowing you to edit and execute scripts and interactive interpreters directly on the Android device. These scripts have access to many of the APIs available to full-fledged Android applications, but with a greatly simplified interface that makes it easy to get things done. Scripts can be run interactively in a terminal, in the background, or via Locale. Python, Perl, JRuby, Lua, BeanShell, JavaScript, Tcl, and shell are currently supported, and we're planning to add more."


Sample Programs:


package require Tcl 
package require android 
set android [android new] 
 
puts "auto_path: $auto_path" 
 
$android vibrate 
 
#$android getRingerVolume 
#$android showContacts 
#$android getInput "title string" "Enter something" 
#$android scanBarcode 
#$android pickContact 
#$android webSearch "android scripting tclsh" 
 
#set time [clock format [clock seconds] -format "%I %M %p on %A, %B %e %Y."] 
#$android speak $time 
 
$android makeToast "You are using Tcl [info patchlevel] on Android!!" 
 
set pkgs [$android getRunningPackages] 
 
 
flush stdout 
after 1000 {set ::forever 1} ; vwait ::forever 

Tcl in NASA

fitsTcl: TCL interface to FITS Files


fitsTcl is an extension to the TCL language, providing simple access to astronomical data stored in FITS file format. fitsTcl implements a TCL interface to the CFITSIO library, developed by the HEASARC (High Energy Astrophysics Science Archive Research Center) at the NASA Goddard Space Flight Center. fitsTcl is primarily distributed as part of the fv FITS file editor. It is also available by itself below. The latest version is 2.3, released July, 2009. This is identical to the version in the most recent release of fv (version 5.3, released July, 2009).

XSPEC and tcl/tk

XSPEC uses the Tool Command Language (tcl) to process command input. Because tcl is a full scripting language, this interface allows users to write complex scripts with loops, branching, etc., which utilize XSPEC commands. In this section of the help file we describe how to use those features of tcl necessary to give the user similar functionality to that available in previous versions of XSPEC, and to give information on the details of our tcl implementation that may be useful to experienced tcl users. For a description of tcl, see, for example, "Practical Programming in Tcl and Tk", B. Welch, (1997, Prentice Hall).
Tk, tcl's companion graphical user interface (GUI) toolkit, is also loaded by XSPEC on startup. It is planned that future versions of XSPEC will provide an optional GUI side-by-side with the command line interface (CLI). Although XSPEC does not currently use tk, its presence allows users to write XSPEC scripts with graphical interfaces using Tk commands.

XImage and Tcl Scripting

Tcl Scripting

Tcl is a scripting language which provides new capabilities to the ximage command line beyond the program-specific commands, allowing for example if-branching and looping which was previously unavailable to ximage scripts.
This page is a primer for Tcl scripting in ximage and contains only basic Tcl commands. For a full reference of all Tcl commands, see the Tcl manual (Use command "puts $tcl_patchLevel" in ximage to determine version).

LHEATcl Plugin API

The LHEATcl Plugin is an enhanced version of the TCL Plugin version 2.0 source release. The version number of the current LHEATcl release is 2.0 despite the fact that it is the first official release in order to match the version number of the TCL plugin that it "descends" from. The LHEATcl Plugin adds the following extra features to the plugin:
  • The dash patch : This adds several missing things to the Tk canvas widget. These include dashed and stippled outlines, the "visitor" patch to allow easier extension of canvas capabilities, and postscript output for images. See the dash patch home page for details.
  • FitsTcl: This adds the ability to read and write FITS files. It is essentially a Tcl interface to cfitsio
  • POW: A scientific curve and image plotting and interface widget which uses the Tk canvas with several extensions to produced curve plots, images, contours, histograms, etc. Since y using the Tk canvas, user input can be done almost any way you wish.
  • The LHEA orbit library. This is currently under development and in release 2.0, only three functions are present which are built into the POW library, but in future releases, this will be a separate package adding spacecraft orbit calculation utility routines.
Follow the links above to get in depth information on any of the LHEATcl components. Documentation for the original Tcl plugin is here. What follows is a brief description of how the plugin works followed by some sample tclets.

Maki - XRS FOV and Multi-Mission Observing Windows


Maki is a tool designed to serve two purposes: investigating instrument Fields of View (FOV's), and viewing multi-mission observing windows.
Maki allows the user to plot a detector FOV onto a FITS image, further allowing the user to investigate different roll angles. This is useful, for example, for the case of an observation of an extended target which requires a specific roll angle. Maki allows the user to see when the target is observable for the given roll angle.
While previous versions of Maki allowed users to overlay FOV's directly via Skyview, the current version does not support this functionality. Further, at this time, Maki has only been built and tested on Linux and Solaris. We are working to port Maki to other platforms. If you do not have access to Linux or Solaris machines, please drop us a note.

Sunday, January 23, 2011

Tcl/Tk and Satellite Tracking System

SaVi allows you to simulate satellite orbits and coverage, in two and three dimensions. SaVi project is particularly useful for simulating satellite constellations such as Teledesic and Iridium.

Requirements:
SaVi requires:

  • an ANSI C compiler, e.g. gcc from http://www.gnu.org/software/gcc/


  • tested and builds with egc variants: gcc 2.95, 3.2 and 3.3.1.


  • Tcl and Tk, from http://www.tcl.tk/


  • most recently tested with Tcl/Tk 8.4; use of Tk color picker and load/save file dialogs demands a minimum of Tcl/Tk 7.6/4.2.


  • Tcl/Tk 8.x gives increased performance, and is recommended.


  • If an existing installation of Tcl does not include header files, e.g. /usr/include/tcl.h, you may be able to add these by installing the tcl-devel package.

    SaVi can optionally use:


  • the zlib compression library, from http://www.gzip.org/zlib/


  • most recently tested with zlib 1.2.1. To build with zlib to compress dynamic texturemaps that are sent to Geomview, remove the


  • DNO_ZLIB flag from src/Makefile.


  • the X Window system. SaVi's fisheye display requires X, but can be disabled by passing the -no-X command-line flag to SaVi. X libraries are required to compile SaVi.


  • Geomview, discussed below. Geomview requires an X Window installation.

    SaVi has been successfully compiled and run on the following machines and unix-like operating systems:


  • Intel x86 / Linux (Red Hat 6.x, 7.0, 7.2; Fedora Core 2; Mandrake 9.0)


  • Sun SPARC / Solaris (2.4 and later)


  • SGI / Irix5


  • Intel x86 / Cygwin (1.5.9-1 to .12-1. Use of SaVi's fisheye view currently requires an X display, so the fisheye view is automatically disabled under Cygwin for the non-X Insight Tcl that is supplied with Cygwin. Compiling Tcl/Tk for use of SaVi with Geomview together in an X display window is recommended. You may also need to edit tcl/Makefile to run a custom tclsh executable with older versions of Cygwin.)

    Installation

    For the remainder of this file, we shall refer to the directory originally containing this README file, the root of the SaVi tree, as $SAVI. That is, if you are a user and have unpacked SaVi in your home directory, then $SAVI would be the topmost SaVi directory ~user/saviX.Y.Z that contains this README file that you are reading.

    1.) In $SAVI/src/Makefile_defs.ARCH, (ARCH is linux, sun, irix, or cygwin) you may need to edit some variables to suit your system. If your system is current with recent versions of Tcl and Tk installed, and everything is in its usual place, the generic defs file called "Makefile_defs." may work perfectly, and typing 'make' in SaVi's topmost directory may be
    sufficient to compile the C files in src/ and index the Tcl files in tcl/.

    If not, choose the Makefile_defs. file most suitable for your system and:

    - edit the variables that give the locations of the Tcl/Tk libraries and header include files.

    - edit the variables that point to the X11 libraries and include files.

    - set the CC variable to an ANSI C compiler, e.g. gcc

    2.) Return to the topmost SaVi directory $SAVI. Once in that directory, type e.g. 'make ARCH=linux' (or sun, or irix, or cygwin) in the topmost $SAVI directory. Typing just 'make' in the topmost directory will use the default Makefile_defs. file.

    3.) You may also need to edit the locations of the Tcl and Tk libraries in $SAVI/savi at the TCL_LIBRARY and TK_LIBRARY lines when linking dynamically.

    If running the savi script to launch SaVi generates Tcl or Tk errors, it is often because either the TCL_LIBRARY or TK_LIBRARY lines need to be corrected in that shell wrapper, or because make was not done using the top-level Makefile in the $SAVI directory. SaVi needs $SAVI/tcl/tclIndex to run. That tcl/tclIndex file must be generated by the tcl/Makefile that, like all other subdirectory Makefiles, is called by the top-level master Makefile in the same directory as this README file.

    Using

    As in the previous section, we refer to the directory containing this README file as $SAVI.

    1.) To run SaVi standalone, without needing Geomview, in the $SAVI directory type:

    ./savi

    Or from any other directory,

    $SAVI/savi

    To load in a satellites tcl scriptfile directly, type:

    ./savi filename

    SaVi supports a number of command-line switches, many related to use with Geomview. To see these, type:

    ./savi -help

    2.) To run SaVi as a module within Geomview, for 3D rendering, when in the $SAVI directory start up Geomview:

    geomview

    and then select "SaVi" from Geomview's scrollable list of external modules. Or invoke directly:

    geomview -run savi [flags] < script filename >

    Or from any directory where you can start Geomview, try

    geomview -run savi [flags] < script filename >

    You might invoke a saved one-line script, to pass parameters through to SaVi:

    geomview -run savi [always-on flags] $*

    3.) To make SaVi accessible to other users, you can copy the "savi" script in $SAVI to some directory in other users' search paths such as /usr/local/bin, so they needn't add SaVi's own directory to their own path. If you do, edit the "savi" script, inserting the full path name of $SAVI as indicated in the script itself:

    # If you copy this script from the SaVi installation and run it elsewhere,
    # then you should uncomment the following line:
    # SAVI=/usr/local/savi
    # and replace /usr/local/savi with the location of
    # your SaVi installation.

    You can also make SaVi accessible from Geomview's scrollable list of external modules. Assuming Geomview is installed in /usr/local/Geomview, say:

    cd /usr/local/Geomview/modules/sgi

    Create a file here called ".geomview-savi" containing e.g.:

    (emodule-define "SaVi" "/usr/local/savi1.2.6/savi")

    where the right-hand side is the absolute path name for the savi script.

    What's New in This Release:


  • makes SaVi easier to build on Linux systems, by adjusting the Linux makefile definitions. See the RELEASE-NOTE file.


    SaVi allows you to simulate satellite orbits and coverage, in two and three dimensions. SaVi is particularly useful for simulating satellite constellations such as Iridium and Globalstar. SaVi runs on Microsoft Windows (under Cygwin), on Macintosh OS X, Linux and Unix. To get started with SaVi, download SaVi 1.4.3 (from UK mirror).
    Read the SaVi user manual and learn about satellite constellations in a tutorial using SaVi. Then take a look at the optional but useful Geomview, which SaVi can use for 3D rendering.
    Further information on SaVi is available. SaVi is supported via the SaVi users mailing list.
    SaVi is developed at SourceForge. There is a SaVi developers mailing list.

    Tcl and Wirless

    Tcl script for implementing DSR routing protocol in wireless network

    Description:

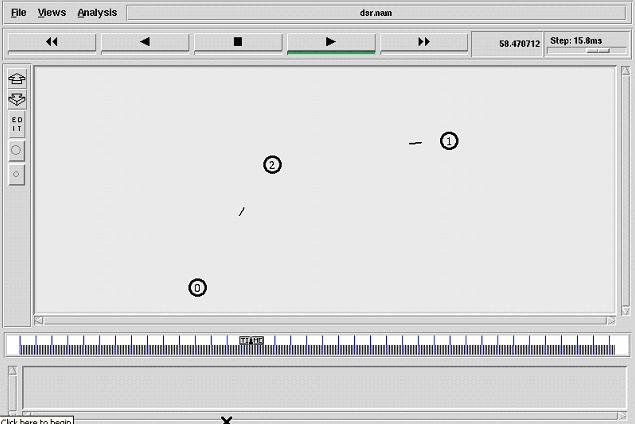
    This network consists of 3 nodes. After creating the nam file and trace file, we set up topography object. Set node_ ($i) [$ns node] is used to create the nodes. Here we set the initial position for the every node by using initial_node_pos. After that $Val (stop) is used to tell to nodes when the simulation ends. the nodes have Tcp connection. A "tcp" agent is attached to Client1, and a connection is established to a tcp "sink" agent attached to node0 and node1. As default, the maximum size of a packet that a "tcp" agent can generate is 1KByte. A tcp "sink" agent generates and sends ACK packets to the sender (tcp agent) and frees the received packets. The ftp is set to start at 10.0 sec and stop at 150.0 sec. Here we were using DSR routing protocol.
    File name: “Dsr.tcl”

    #-------Event scheduler object creation--------#
    set ns              [new Simulator]
    #Creating trace file and nam file
    set tracefd       [open dsr.tr w]
    set windowVsTime2 [open win.tr w]
    set namtrace      [open dsr.nam w]   
    $ns trace-all $tracefd
    $ns namtrace-all-wireless $namtrace $val(x) $val(y)
    # set up topography object
    set topo       [new Topography]
    $topo load_flatgrid $val(x) $val(y)
    create-god $val(nn)
    # configure the nodes
            $ns node-config -adhocRouting $val(rp) \
                       -llType $val(ll) \
                       -macType $val(mac) \
                       -ifqType $val(ifq) \
                       -ifqLen $val(ifqlen) \
                       -antType $val(ant) \
                       -propType $val(prop) \
                       -phyType $val(netif) \
                       -channelType $val(chan) \
                       -topoInstance $topo \
                       -agentTrace ON \
                       -routerTrace ON \
                       -macTrace OFF \
                       -movementTrace ON
                     
          for {set i 0} {$i < $val(nn) } { incr i } {
                set node_($i) [$ns node]     
          }
    # Provide initial location of mobilenodes
    $node_(0) set X_ 5.0
    $node_(0) set Y_ 5.0
    $node_(0) set Z_ 0.0
    $node_(1) set X_ 490.0
    $node_(1) set Y_ 285.0
    $node_(1) set Z_ 0.0
    $node_(2) set X_ 150.0
    $node_(2) set Y_ 240.0
    $node_(2) set Z_ 0.0
    # Generation of movements
    $ns at 10.0 "$node_(0) setdest 250.0 250.0 3.0"
    $ns at 15.0 "$node_(1) setdest 45.0 285.0 5.0"
    $ns at 110.0 "$node_(0) setdest 480.0 300.0 5.0"
    # Set a TCP connection between node_(0) and node_(1)
    set tcp [new Agent/TCP/Newreno]
    $tcp set class_ 2
    set sink [new Agent/TCPSink]
    $ns attach-agent $node_(0) $tcp
    $ns attach-agent $node_(1) $sink
    $ns connect $tcp $sink
    set ftp [new Application/FTP]
    $ftp attach-agent $tcp
    $ns at 10.0 "$ftp start"
    # Printing the window size
    proc plotWindow {tcpSource file} {
    global ns
    set time 0.01
    set now [$ns now]
    set cwnd [$tcpSource set cwnd_]
    puts $file "$now $cwnd"
    $ns at [expr $now+$time] "plotWindow $tcpSource $file" }
    $ns at 10.1 "plotWindow $tcp $windowVsTime2" 
    # Define node initial position in nam
    for {set i 0} {$i < $val(nn)} { incr i } {
    # 30 defines the node size for nam
    $ns initial_node_pos $node_($i) 30
    }
    # Telling nodes when the simulation ends
    for {set i 0} {$i < $val(nn) } { incr i } {
        $ns at $val(stop) "$node_($i) reset";
    }
    # ending nam and the simulation
    $ns at $val(stop) "$ns nam-end-wireless $val(stop)"
    $ns at $val(stop) "stop"
    $ns at 150.01 "puts \"end simulation\" ; $ns halt"
    proc stop {} {
        global ns tracefd namtrace
        $ns flush-trace
        close $tracefd
        close $namtrace
    exec nam dsr.nam &
    exit 0
    }
    $ns run
    # How to run the program:
    $ns dsr.tcl
    #snapshot of the program:


    A Wireless Network


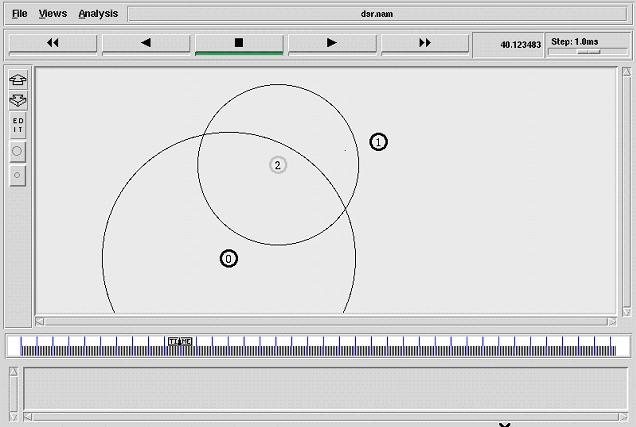
    In this section, we are going to develop a TCL script for NS which simulates a simple wireless network.  We are going to learn how a wireless network  functions, how data is sent from one node to another, and how CSMA works.  (If you are not familiar with how to create a simple network, please refer to this link ... Your First Network)

    We are going to simulate a very simple 2-node wireless scenario.  The topology consists of two mobile nodes, node_(0) and node_(1).  The mobile nodes move about within an area whose boundary is defined in this example as 500m x 500m. The nodes start out initially at two opposite ends of the boundary.  Then they move towards each other in the first half of the simulation and again move away for the second half.  A TCP connection is setup between the two mobile nodes.  Packets are exchanged between the nodes as they come within hearing range of one another. As they move away, packets start getting dropped.
    You will need to define options to use for the rest of the script and the two other tutorials but with slight changes.  You can view it here.
    Next we go to the main part of the program and start by creating an instance of the simulator,
    set ns_    [new Simulator]

    Then setup trace support by opening file simple.tr and call the procedure trace-all {} as follows:
    set tracefd     [open simple.tr w]
    $ns_ trace-all $tracefd           
    
    set namtrace    [open simple-wireless.nam w]

    Next create a topology object that keeps track of movements of mobile nodes within the topological boundary.
    set topo [new Topography]

    We had earlier mentioned that mobile nodes move within a topology of 500m x 500m. We provide the topography object with x and y co-ordinates of the boundary, (x=500, y=500) :
    $topo load_flatgrid 500 500
    $ns_ namtrace-all-wireless $namtrace 500 500


    The topography is broken up into grids and the default value of grid resolution is 1. A different value can be passed as a third parameter to load_flatgrid {} above.
    Next we create the object God, as follows:
    create-god $val(nn)

    Quoted from CMU document on god, "God (General Operations Director) is the object that is used to store global information about the state of the environment, network or nodes that an omniscient observer would have, but that should not be made known to any participant in the simulation." Currently, God object stores the total number of mobile nodes and a table of shortest number of hops required to reach from one node to another. The next hop information is normally loaded into god object from movement pattern files, before simulation begins, since calculating this on the fly during simulation runs can be quite time consuming. However, in order to keep this example simple we avoid using movement pattern files and thus do not provide God with next hop information. The usage of movement pattern files and feeding of next hop info to God shall be shown in the example in the next sub-section.

    Create the specified number of mobile nodes [$val(nn)] and "attach" them to the channel.  The configuration of the nodes can be view here.
    Next we create the 2 mobile nodes as follows:
    for {set i 0} {$i < $val(nn) } {incr i} {
                    set node_($i) [$ns_ node ]
                    $node_($i) random-motion 0       ;# disable random motion
            }    

    The random-motion for nodes is disabled here, as we are going to provide node position and movement (speed & direction) directives next

    Now that we have created mobile nodes, we need to give them a position to start with,
    #
    # Provide initial (X,Y, for now Z=0) co-ordinates for node_(0) and node_(1)
    #
    $node_(0) set X_ 5.0
    $node_(0) set Y_ 2.0
    $node_(0) set Z_ 0.0
    
    $node_(1) set X_ 390.0
    $node_(1) set Y_ 385.0
    $node_(1) set Z_ 0.0

    Node0 has a starting position of (5,2) while Node1 starts off at location (390,385).

    Next produce some node movements,
    #
    # Node_(1) starts to move towards node_(0)
    #
    $ns_ at 50.0 "$node_(1) setdest 25.0 20.0 15.0"
    $ns_ at 10.0 "$node_(0) setdest 20.0 18.0 1.0"
    
    # Node_(1) then starts to move away from node_(0)
    $ns_ at 100.0 "$node_(1) setdest 490.0 480.0 15.0" 

    $ns_ at 50.0 "$node_(1) setdest 25.0 20.0 15.0" means at time 50.0s, node1 starts to move towards the destination (x=25,y=20) at a speed of 15m/s. This API is used to change direction and speed of movement of the mobile nodes.

    Next setup traffic flow between the two nodes as follows:
    # TCP connections between node_(0) and node_(1)
    
    set tcp [new Agent/TCP]
    $tcp set class_ 2
    set sink [new Agent/TCPSink]
    $ns_ attach-agent $node_(0) $tcp
    $ns_ attach-agent $node_(1) $sink
    $ns_ connect $tcp $sink
    set ftp [new Application/FTP]
    $ftp attach-agent $tcp
    $ns_ at 10.0 "$ftp start" 

    This sets up a TCP connection between the two nodes with a TCP source on node0.

    Then we need to define stop time when the simulation ends and tell mobile nodes to reset which actually resets their internal network components,
    #
    # Tell nodes when the simulation ends
    #
    for {set i 0} {$i < $val(nn) } {incr i} {
        $ns_ at 150.0 "$node_($i) reset";
    }
    $ns_ at 150.0001 "stop"
    $ns_ at 150.0002 "puts \"NS EXITING...\" ; $ns_ halt"
    proc stop {} {
        global ns_ tracefd
    $ns_ flush-trace
        close $tracefd
        exec nam simple-wireless.nam  &
        exit 0
    }

    At time 150.0s, the simulation shall stop. The nodes are reset at that time and the "$ns_ halt" is called at 150.0002s, a little later after resetting the nodes. The procedure stop{} is called to flush out traces and close the trace file.

    And finally the command to start the simulation,
    puts "Starting Simulation..."
    $ns_ run

    Save the file simple-wireless.tcl (for a format of how the TCL script should look, view it here).  Next run the simulation in the usual way (type at prompt: "ns simple-wireless.tcl" ).

    Tcl and Expect

    Introduction

    Expect is a tool for automating interactive applications such as telnet, ftp, passwd, fsck, rlogin, tip, etc. Expect really makes this stuff trivial. Expect is also useful for testing these same applications. And by adding Tk, you can also wrap interactive applications in X11 GUIs.
    Expect can make easy all sorts of tasks that are prohibitively difficult with anything else. You will find that Expect is an absolutely invaluable tool - using it, you will be able to automate tasks that you've never even thought of before - and you'll be able to do this automation quickly and easily.

    Expect was conceived of in September, 1987. The bulk of version 2 was designed and written between January and April, 1990. Minor evolution occurred after that until Tcl 6.0 was released. At that time (October, 1991) approximately half of Expect was rewritten for version 3. See the HISTORY file for more information. The HISTORY file is included with the Expect distribution.
    Around January 1993, an alpha version of Expect 4 was introduced. This included Tk support as well as a large number of enhancements. A few changes were made to the user interface itself, which is why the major version number was changed. A production version of Expect 4 was released in August 1993.
    In October 1993, an alpha version of Expect 5 was released to match Tcl 7.0. A large number of enhancements were made, including some changes to the user interface itself, which is why the major version number was changed (again). The production version of Expect 5 was released in March '94.
    In the summer of 1999, substantial rewriting of Expect was done in order to support Tcl 8.2. (Expect was never ported to 8.1 as it contained fundamental deficiencies.) This included the creation of an exp-channel driver and object support in order to take advantage of the new regexp engine and UTF/Unicode. The user interface is highly but not entirely backward compatible. See the NEWS file in the distribution for more detail.
    There are important differences between Expect 3, 4, and 5. See the CHANGES.* files in the distribution if you want to read about the differences. Expect 5.30 and earlier versions have ceased development and are not supported. However, the old code is available from http://expect.nist.gov/old.
    The Expect book became available in January '95. It describes Expect 5 as it is today, rather than how Expect 5 was when it was originally released. Thus, if you have not upgraded Expect since before getting the book, you should upgrade now.

    Historical notes on Tcl and Tk according to John Ousterhout

    I got the idea for Tcl while on sabbatical leave at DEC's Western Research Laboratory in the fall of 1987. I started actually implementing it when I got back to Berkeley in the spring of 1988; by summer of that year it was in use in some internal applications of ours, but there was no Tk. The first external releases of Tcl were in 1989, I believe. I started implementing Tk in 1989, and the first release of Tk was in 1991.


    In the design of automated systems in Expect, one of the more difficult hurdles many programmers encounter is ensuring communication with ill-behaved connections and remote terminals. The send_expect procedure detailed in this article provides a means of ensuring communication with remote systems and handles editing and rebroadcast of the command line. Where a programmer would usually send a command line and then expect the echo from the remote system, this procedure replaces those lines of code and provides the most reliable interface I have come across.  Features of this interface include:
    • Guarantees transmission via remote system echo
    • Tolerates remote terminal control codes and garbage characters in the echo of the sent string
    • Persistence of attempts and hierarchy of methods before declaring a failure
    • Interactively edits and retransmits command lines that cannot be verified
    • Maintains its own moving-window diagnostics files, so they are small and directly associated with the errors
    Communication with local processes (i.e. those running on the same workstation as the expect process) is typically not problematic and does not require the solutions detailed in this article.  External processes, however, can create a number of problems that may or may not affect communication, but will affect an automated system's ability to determine the success of the communication.  In cases where it is corrupted, it is not always immediately obvious: a corrupted command may trigger an error message, but data which has been corrupted may still be considered valid and the error would not show up immediately, and may cause a variety of problems.  This is why it is necessary to ensure that the entire string that is transmitted is properly received echoed by the remote system.
    The basic idea of this interface is to send the command string except for its terminating character (usually, a carriage return) and look at the echo from the remote system.  If the two can be matched using the regular expressions in the expect clauses, then the terminating character is sent and transmission is considered successful. If success cannot be determined, the command line is cleared instead of being sent, and alternative transmission modes are used.
    In many cases, nothing more than expecting the exact echo of the string is sufficient.  If you're reading this article, though, I suspect that you've encountered some of the problems I have when programming in Expect, and you're looking for the solution here.  If you're just reading out of interest, the problems arise when automating a session on a machine off in a lab, or on the other side of the world.  Strange characters pop up over the connection, and the terminal you're connected to does weird things with its echo, but everything is working.  It becomes very difficult to determine if what was sent was properly received when you have noise on the connection, terminal control codes inserted in the echo, and even server timeouts between the automation program and the remote session.  This interface survives all of that, and if it can't successfully transmit the string, it means that the connection to the remote system has been lost. 
    The code provided in this article is executable, but needs to be incorporated into any system in which it is to be used.  Ordinarily, system-dependent commands need to be added based on the needs of the target system.  Also, this code uses simple calls to the puts command to output status messages - these should be changed to use whatever logging mechanism is used by the rest of the system.  A final caveat, and I can't emphasize this enough: always wear eye protection. 

    The procedures provided in this article are:
    The interface is initialized with the send_expect_init procedure, which sets up all the globals required by the other procedures.  See the section on controlling the behavior of the interface for an explanation of the parameters.  The send_expect_init procedure is run once, at the beginning of execution (before the interface is to be used).  It may be run a second time to restore settings, if necessary. 
    The send_only procedure is a wrapper for the exp_send command, and is used by send_expect to transmit strings.  The only time this procedure is called directly is for strings that are not echoed, such as passwords, and multi-byte character constants, such as the telnet break character (control-]).
    The send_expect procedure is the actual interface between the automated system and its remote processes, and is detailed in the next section.
    Finally, the send_expect_report procedure is used at the end of execution to output the statistics of the interface for debugging.  This procedure may also be run during execution, if incremental reports are needed.

    Using The send_expect Procedure
    Once the interface has been initialized using send_expect_init, and a process has been spawned, it is ready to be used with the syntax:
    send_expect id command;
    where 
    id = the spawn id of the session on which to send the command, and 
    command = the entire command string including the terminating carriage-return, if any. 
    This syntax, and the implementation of the expression-action lists, support multiple-session applications. 
    The examples provided in this article are simple examples but with more attention to detail, and where warranted a complete implementation is provided as an example.  The send_expect procedure usually replaces only two lines of code in an existing system.
    The full syntax for properly using the interface is actually:
      if { [send_expect $id $command] != 0} {
       ## handle your error here
      }

    The interface uses four different transmission modes, in order:

  • 1) send the entire string and hope for the best (fastest, but least reliable)


  • 2) send the entire string using the send_slow list


  • 3) send the string in blocks of eight characters


  • 4) send the string one character at a time (slowest, but most reliable)


  • If a mode fails, the command line is cleared by sending the standard control-U, the expect buffer is cleared, and the next mode is tried.  Each mode except the last one can also have a failure tolerance set, using:
    sendGlobals(ModeXFailMax),   where X is either 1,2 or 3. 
    If this max value is set to a positive number, once the failures for that mode exceeds this value, it is no longer used.  If it is set to 0, then each mode is tried for each transmission, regardless of the number of failures.  Each of the modes uses the send_only procedure as a wrapper for exp_send.  If this procedure returns an error, it most likely means that the connection was lost, and the spawn id is checked to see if the session is still active.  The error is returned to send_expect, which in turn returns an error to the calling procedure.
    For local processes and robust remote connections, mode 1 is usually sufficient.  If the remote system is a bit slow, mode 2 may be required.  Mode 3 has proven invaluable when connected to routers and clusters which provide rudimentary terminal control.  Mode 4 is rarely required, but acts as a backup to mode 3.

    Controlling The Behavior Of The Interface:
    The sendGlobals array contains all of the parameters used by the interface, and is initialized with send_expect_init.  It may be modified at runtime to control how the interface works.  This section will cover the meanings of these parameters and how they may be modified.
    The failure limit elements (Mode1FailMax, Mode2FailMax, and Mode3FailMax) determine how many failures are permitted for modes 1, 2 and 3 (respectively).  A value of zero disables this limitation, and any positive integer sets the maximum number of failures for that mode before it is no longer used by the interface.  There is no failure limit for the last mode.
    The element useMode allows the system to determine which transmission mode should be used first, so that the less reliable modes (the first and second) can be bypassed.  Allowable values for this parameter are 1, 2, 3, or 4.  Invalid values will be replaced by the default mode (1).
    If transmission errors are not considered fatal, the sendErrorSeverity element may be specified to a more tolerant value.  Note that this parameter is not used internally, so if the automated system does not access this value, it won't affect the interface.
    The kill element defines the command line kill character, which is defaulted to the Gnu-standard control-U. 
    The diagFile parameter names the temporary internal diagnostics file (generated from exp_internal).
    The logDiags allows disabling of all diagnostics output for faster execution, but be forewarned that disabling this feature well make debugging much more difficult.
    The interval and delay elements represent the two items in the send_slow list, which is used by the second and third modes. 
    For experimentation purposes, it is recommended that these parameters be modified by the automated system at runtime, rather than directly editing the defaults in the initialization procedure.  Once valid settings are found the defaults may be changed to reflect them

    Tcl Socket Programming

    Example Code - Socket server and client

    This is code from a simple echo server and client posted to the Newsgroup by Ray Tripamer (ray@asci.com). I've commented it to make it a little clearer why its doing what it is and to serve as something of an example of what you have to do to implement socket servers and clients in Tcl.

    Echo Client

    This implements a client that opens a server connection, sends messages from stdin, receives server replies and sends them to stdout.
    #!/usr/local/bin/tclsh7.5
    
    # Read data from a channel (the server socket) and put it to stdout
    # this implements receiving and handling (viewing) a server reply 
    proc read_sock {sock} {
      set l [gets $sock]
      puts stdout "ServerReply:$l"
    }
    
    # Read a line of text from stdin and send it to the echoserver socket,
    # on eof stdin closedown the echoserver client socket connection
    # this implements sending a message to the Server.
    proc read_stdin {wsock} {
      global  eventLoop
      set l [gets stdin]
      if {[eof stdin]} {
        close $wsock             ;# close the socket client connection
        set eventLoop "done"     ;# terminate the vwait (eventloop)
      } else {
        puts $wsock $l           ;# send the data to the server
      }
    }
    
    # open the connection to the echo server...
    set eshost "scoda"
    set esport 9999
    
    # this is a synchronous connection: 
    # The command does not return until the server responds to the 
    #  connection request
    set esvrSock [socket $eshost $esport]
    
    #if {[eof $esvrSock]} { # connection closed .. abort }
    
    # Setup monitoring on the socket so that when there is data to be 
    # read the proc "read_sock" is called
    fileevent $esvrSock readable [list read_sock $esvrSock]
    
    # configure channel modes
    # ensure the socket is line buffered so we can get a line of text 
    # at a time (Cos thats what the server expects)...
    # Depending on your needs you may also want this unbuffered so 
    # you don't block in reading a chunk larger than has been fed 
    #  into the socket
    # i.e fconfigure $esvrSock -blocking off
    
    fconfigure $esvrSock -buffering line
    
    # set up our keyboard read event handler: 
    #   Vector stdin data to the socket
    fileevent stdin readable [list read_stdin $esvrSock]
    
    # message indicating connection accepted and we're ready to go 
    puts "EchoServerClient Connected to echo server"
    puts "...what you type should be echoed."
    
    # wait for and handle either socket or stdin events...
    vwait eventLoop
    
    puts "Client Finished"
    
    Another option is to do an asynchronous client connection
    
    set esvrSock [socket -async $eshost $esport]
    
    # .... do whatever that we can't connect synchronously... 
    
    # resync with the connection, 
    #Socket becomes writable when connection available
    fileevent $esvrSock writable { set connect 1 }
    vwait connect   
        # will 'block' here till connection up (or eof or error)
    
    fileevent $esvrSock writable {}    ;# remove previous handler
    
    if {[eof $esvrSock]} { # connection closed .. abort }
    
    # set translation, buffering  and/or blocking modes
    fconfigure $esvrSock -translation {auto crlf} -buffering line
        ...


    Echo Server

    Server that reflects its client messages back to the source
    
    #!/usr/local/bin/tclsh7.5
    
    set svcPort 9999
    
    # Implement the service
    # This example just writes the info back to the client...
    proc doService {sock msg} {
        # puts $sock "echosrv:$l"
         puts $sock "$l"
    }
    
    # Handles the input from the client and  client shutdown
    proc  svcHandler {sock} {
      set l [gets $sock]    ;# get the client packet
      if {[eof $sock]} {    ;# client gone or finished
         close $sock        ;# release the servers client channel
      } else {
        doService $sock $l
      }
    }
    
    # Accept-Connection handler for Server. 
    # called When client makes a connection to the server
    # Its passed the channel we're to communicate with the client on, 
    # The address of the client and the port we're using
    #
    # Setup a handler for (incoming) communication on 
    # the client channel - send connection Reply and log connection
    proc accept {sock addr port} {
      
      # if {[badConnect $addr]} {
      #     close $sock
      #     return
      # }
    
      # Setup handler for future communication on client socket
      fileevent $sock readable [list svcHandler $sock]
    
      # Read client input in lines, disable blocking I/O
      fconfigure $sock -buffering line -blocking 0
    
      # Send Acceptance string to client
      puts $sock "$addr:$port, You are connected to the echo server."
      puts $sock "It is now [exec date]"
    
      # log the connection
      puts "Accepted connection from $addr at [exec date]"
    }
    
    
    # Create a server socket on port $svcPort. 
    # Call proc accept when a client attempts a connection.
    socket -server accept $svcPort
    vwait events    ;# handle events till variable events is set


    Background

    Heres some background from Jan Wieck (wieck@sapserv.debis.de) of the concepts involved with Socket library calls generally and how that maps into Tcl. It may help illuminate some of the above.
    Socket below means STREAM socket in AF_INET (Internet domain)
    What's a socket? A socket is bidirectional communication channel. Bidirectional, because it allows sending and receiving. A socket is identified from the process point of view by a handle (file descriptor in UNIX). On the network side it's identified by a network host address AND a port number. It's created by the system call socket(2). When socket(2) returns a valid handle (file descriptor), it has already assigned the network address and a dynamically allocated port number that isn't in use by another socket on your local system. This combination of host address and port number is called the socket name.
    To connect two sockets, to form something like a bidirectional pipe, a program must call connect(2) with the socket name of the remote socket given in sockaddr. Because it's very difficult, to guess the dynamic port number, there is way to change the 'name' of a socket. The system call to do that is bind(2). Bind has some restrictions. The port number you want must not be in use by any other socket on the local system. Thus, it's guaranteed, that all socket names all over the world are unique and name only one single handle in a process (as long as all the host addresses are unique). Only the superuser can bind to a port number below 1024 as these are allocated as 'system' services and we don't want to allow spoofing of these..
    Since normally a server is sitting somewhere around, waiting for a client that wants to connect, it's usual to give the server socket a fixed name. Fixed name in this case means, that the server will create a socket and bind it to the current host address and a fixed port number. The file /etc/services is a list of hopefully all the port numbers for standard services
    So let's fire up the server.
    • The server process first calls socket(2) to create a socket with a partly random name.
    • the server calls bind(2) to give the socket a fixed name, that will be used later by the clients.
    • Third, the server tells the kernel, that it is willing to accept incoming connection requests by calling listen(2).
    In Tcl, all the three steps are performed if you issue
    socket -server {command} port
    
    Port must be the port number the client will use in it's connection request (see below).
    What we now have is a server socket. Back to C. This socket becomes readable when a client wants to connect. But the readability in this case doesn't mean that you can read data from it. It's a hack to tell the server process that there's someone knocking at the door. So let's take a look at the client.
    A client process too creates a socket. But it doesn't care about the socket name (except for special purposes that deal with security). So it leaves it untouched and directly tries to establish the connection using connect(2). The connect(2) system call needs the remote socket name of the server socket. The server explicitly 'named' it's socket (host+port), so this isn't any problem.
    At this moment, the server socket becomes readable. The server now calls accept(2) on it's socket. accept(2) creates a new socket, again with a dynamically assigned port number. This new socket and the socket in the client form the bidirectional pipe. accept(2) returns the handle (file descriptor) of the new socket and fills a buffer with the socket name of the clients socket.
    In Tcl, the two steps for the client (calling socket(2) and connect(2)) are performed if you issue
    socket host port
    
    What you might miss in Tcl is the accept step. But it's there. Because accept(2) normally blocks until there is at least one client that wants to connect, Tcl enforces that you go into the event driven world. After you created the server socket, Tcl controls the readability of the server socket in it's event loop. If it becomes readable, i.e. a client wants to connect, Tcl does the accept(2) and calls command with all the information given by accept(2). So command will be invoked one time for every client that connects to your server. But this requires, that the server get's back into the event loop. So you have to switch the communication socket in the server (that one given as argument to command) to nonblocking I/O and do everything in fileevent handlers.
    It is important, that a server process is completely controlled by the event loop (default for Tk, using vwait in Tcl).